Sponsored
Techradar |

- White Google Nexus S confirmed for UK launch
- Google Nexus S launching on Vodafone
- Competition: WIN! An LG HX300G LED projector
- Canon invites the IXUS 115, 220 and 310 HS to its digicam party
- Canon PowerShot SX230 HS and SX220 HS announced
- Canon EOS 1100D budget DSLR revealed
- Canon EOS 600D DSLR announced
- Tutorial: Build a transcoding UPnP media server
- Review: Sony Vaio VPCEC3S0E/WI
- Review: LG 42LE4900
- Tutorial: How to add cool Dock effects to OS X
- In Depth: Designing Ubuntu
| White Google Nexus S confirmed for UK launch Posted: 07 Feb 2011 01:09 AM PST 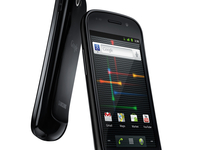 Vodafone has confirmed to TechRadar that it will be stocking the white Nexus S when it launches in the next few months. Vodafone is the first network to range the Google Nexus S after it launched with The Carphone Warehouse and Best Buy at the tail end of last year and it appears its patience has been rewarded with an exclusive colour. The launch of a premium smartphone in another colour is another snook cocked to Apple, with the Cupertino brand still failing to launch a white iPhone 4 nearly 9 months after it was announced. We hope it'll be all-white We're hoping that the white Nexus S isn't going to look the same way it did in early leaked pictures, where it simply had an off-white battery cover and the same black front. However, it should come in at the same price range as its noir brother when it lands, likely around £30 per month on a two year deal. Vodafone couldn't give us an exact UK release date for the white Nexus S, but given the slew of releases coming soon from Mobile World Congress 2011, we'd imagine it would be pushing to have this little white nugget out by the end of Q1 at the latest.
| ||
| Google Nexus S launching on Vodafone Posted: 07 Feb 2011 01:08 AM PST  Vodafone has announced that the Google Nexus S, the first handset to run Android 2.3, will be landing on its network. The phone was launched in the UK at the end of 2010, but was only available through Carphone Warehouse and Best Buy. However, it will now be stocked on one of the UK's largest networks, giving the second Google-phone a wider range of exposure to more customers. We need details We don't have a UK release date or price yet, but thankfully a Vodafone spokesperson confirmed to TechRadar that the Nexus S will be coming to the UK – we're always slightly worried when we get a global release that doesn't specifically mention the UK. It's likely the new phone won't be the most expensive in the red network's range either, probably landing at £30 a month on a two year deal if Carphone Warehouse's price is any kind of guide. As you will have seen in our Google Nexus S review, the handset is crammed full of next-gen tech (Super AMOLED curved 4-inch screen, NFC contactless technology) and the 'pure' Android experience, so hopefully Vodafone won't have to delay when it comes to pushing out updates for this handset.
| ||
| Competition: WIN! An LG HX300G LED projector Posted: 07 Feb 2011 01:00 AM PST  Ever wished you had your own home multimedia room? With the LG HX300G LED projector, you can view cinema-quality multimedia content including movies, sporting events, MP3s, home videos and pictures at up to 1.35 metres wide within the comfort of your own home. The ultra-slim, micro portable HX300G from LG is the world's first XGA LED projector and delivers a colour range so wide and picture quality so sharp and bright, you will forget you're not in a cinema! The HX300G supports DivX HD, MP3 and JPEG files and File Viewer software, so it's multi- functional and easy to connect through a USB. Whether you're at home, at work or on the move, the lightweight HX300G offers a superior picture and colour quality, wherever you go.
To celebrate the launch of its innovative projector range, leading consumer electronics manufacturer, LG, is giving away one of these stylish, ultra slim, go-anywhere HX300G projectors. To be in with a chance of winning one of these eight prizes, visit our competition page.
------------------------------------------------------------------------------------------------------- Please note that this competition is only open to UK residents over 18 years of age.
| ||
| Canon invites the IXUS 115, 220 and 310 HS to its digicam party Posted: 07 Feb 2011 12:43 AM PST  Canon has revealed a new pack of compact cameras have joined its IXUS line-up, offering Full HD shooting, low-light capabilities and a smattering of style. The Canon IXUS 115 HS is the baby of the group. It is available in four colours and can record Full HD 1080p movies. There's 32 different scene modes on board and it has been given a 28mm wide-angle, 4x optical zoom Canon lens with optical image stabiliser. This is coupled with a 12.1MP CMOS sensor, 3-inch PureColor II G LCD and High-speed Burst and Super Slow Motion Movie capture modes. For those who like a gimmick, there is also a Miniature and Toy Camera mode on the camera. The Canon IXUS 115 HS has a UK release date of February 2011, and is priced at £179. IXUS 220 HS Canon has also announced the arrival of the Canon IXUS 220 HS. This camera features for the more abled camera person, offering a back-illuminated CMOS sensor, DIGIC 4 processing and a ultra-wide angle 24mm lens with 5x optical zoom. The IXUS 220 HS is the smallest Canon camera to offer Full HD shooting and can capture footage at 24fps. Like its 115 HD bedfellow, the IXUS 220 HS also has a 12.1MP CMOS sensor, a slightly smaller viewfinder at 2.7 inches and High-speed Burst and Super Slow Motion Movie movies. For those who want to make a scene, there are 32 on offer here and you also get a Movie Digest mode, which takes your video clips and makes a montage out of them. The Canon IXUS 220 HS has a UK release date of mid February and is priced at £199. IXUS 310 HS The Canon IXUS 310 HS is the premium model of the range, bringing the same 12.1MP CMOS sensor, with DIGIC 4 processing, but with the addition of a stainless steal body, and a f2.0, 24mm, 4.4x zoom lens with optical IS. The viewfinder is also bigger at 3.2 inches and you can shoot Full HD with optical zoom. You also have the usual 32 scene modes to play around with, as well as High-speed Burst and Super Slow Motion Movie modes. And there's also more manual control given to the IXUS 310 HS. The Canon IXUS 310 HS has a UK release date of March 2011 and is priced at £299.
| ||
| Canon PowerShot SX230 HS and SX220 HS announced Posted: 07 Feb 2011 12:36 AM PST  In what is a busy day of Canon releases, the camera company has announced two new cameras for its PowerShot range, the Canon PowerShot SX230 HS and PowerShot SX220 HS. The Canon PowerShot SX230 HS comes brandishing a 12.1MP sensor, 28mm lens with 14x zoom and optical IS, and a 3.0-inch PureColor II G LCD. There's also the ability to film Full HD footage, 32 scene modes to choose from and High-speed Burst and Super Slow Motion Movie modes to play around with. This is all topped off with GPS functionality. PowerShot SX220 The Canon PowerShot SX220 also brings a 12.1MP sensor to the table, along with 28mm, 14x zoom lens and Full HD shooting. There is also a 3.0-inch PureColor II G LCD on board, as well as Movie Digest and iFrame movie modes. You also get access to 32 scene modes but there is no GPS on the SX220. The Canon PowerShot SX230 HS and Canon PowerShot SX220 HS have a UK release date of mid-March 2011, with pricing to be announced.
| ||
| Canon EOS 1100D budget DSLR revealed Posted: 07 Feb 2011 12:34 AM PST  Canon has unveiled the latest DSLR for its entry level range, the Canon EOS 1100D. Created as a DSLR for those who have never touched a DSLR before, the EOS 1100D offers a 12MP sensor, on-screen feature guide and 720p HD video capture. The EOS 1100D has been given ISO 100-6400 sensitivity, as well as a wide-area 9-point AF system, 63-zone iFCL exposure metering and a 2.7-inch LCD. Cheap price There's an HDMI slot on board, so you can plug the camera straight into your TV and there's also the capability to do high-speed shooting at a passable three frames per second. On-board is something called Eye-Fi Connected Functions, which means that if you plug in an Eye-Fi card you may be able to wirelessly transfer your images. The Canon EOS 1100D is compatible with all EF and EF-S lenses and has a UK release date of April 2011. Price-wise, you can get the EOS 1100D body only for £419. If you add an EF-S 18-55mm f/3.5-5.6 IS II, then it is a penny under £500. If you want the EF-S 18-55mm f/3.5-5.6 IS III lens option then this will be £459.
| ||
| Posted: 07 Feb 2011 12:32 AM PST  Canon has announced the arrival of its latest entry level DSLR, the Canon EOS 600D. Part of Canon's DSLR line-up the 660D is placed above the EOS 550D and the new EOS 1100D, and has an 18-megapixel CMOS sensor and Full HD EOS Movie mode. To help you with your shooting there is an on-screen feature guide and there's also a bunch of creative filters to enhance your images. Automatic for the people There's a new fully-automatic Scene Intelligent Auto mode, which takes the sting out of manual shooting, and the 600D also allows high-speed shooting at 3.7 frames per second. This is coupled with a 9-point autofocus system, an ISO range of 100-6400 and a 3-inch vari-angle LCD. As it is part of Canon's EOS range, it is compatible with over 60 lenses and also Canon's speedlight range. The Canon EOS 600D (body only) has a UK release date of April 2011 and is priced at £679. If you want to pair it with an EF-S 18-55mm f/3.5-5.6 IS II lens then this will set you back £769. If you want a more premium lens (the EF-S 18-135mm f/3.5-5.6 IS) then you are looking at £949.
| ||
| Tutorial: Build a transcoding UPnP media server Posted: 06 Feb 2011 04:00 AM PST  UPnP Media Server 1.0 is a protocol that removes the effort from getting a media-streaming device to access and play your content. If your NAS box stores movies, music and photos, a UPnP server running on this NAS will enable a PlayStation 3 or any other UPnP compatible player to access any player-supported formats from your storage box without any further configuration. JPG images, DIVX movies and MP3 audio will all appear according to sorting options and arrangements, and will all play automatically. Which formats will work and which won't depends on the capabilities of your player device. A PlayStation won't play MKV movie files or Ogg Vorbis music files, for instance, but a good UPnP server should also be able to convert one format to another in real time. This is known as transcoding, and it enables a player to receive transcoded formats as devices access them. One of the best UPnP servers you can install and configure is MediaTomb. The latest major update, from early 2010, was a year late, but added dozens of new features. It transcodes, checks for new files automatically, streams YouTube, supports thumbnails and animated previews of movies, and accommodates even the most awkward of media players. Its configuration file can be used to accommodate almost any format and client eventuality. But the best thing about MediaTomb is that it's free. You can run it from either a Linux-based Arm or x86 NAS, from your own Linux machine or modest server, or even from a spare Apple OS X machine. You just need to know where to start. 1. Installation Getting MediaTomb installed isn't difficult. Most distros carry the package, and you can install it using nothing more than your distribution's package manager. Ubuntu 10.10, for example, currently comes with the latest version of MediaTomb – version 0.12.1 – which is a security update to the major 0.12 release. You can install it by launching the Synaptic package manager, searching for 'MediaTomb', and clicking 'Apply'. This will also grab a few other dependencies, including the daemon and common packages that are listed alongside in Synaptic when you search for MediaTomb.
INSTALLING MEDIATOMB: You can install MediaTomb from the Synaptic package manager, along with a few other dependencies. Search for 'mediatomb', then click 'Apply'. If you're using Ubuntu Server and don't have access to a GUI, typing sudo apt-get install mediatomb should perform the same trick. MediaTomb is a combination of four elements. First is the daemon. This needs to be configured to run silently in the background and wait for requests from media players. Second is the main MediaTomb server process, which handles the request and spits out the functionality. Then there's an epic configuration file that informs the rest of MediaTomb what needs to be done for each device, such as converting Ogg Vorbis files to WAV files for the PS3. Finally, there's content itself. You can place your movies, music and photos anywhere, and use MediaTomb's web interface to add them to its database, or configure the server to check for additions to a specific directory automatically. But before we get to that stage, we need to delve into the config file. 2. Configure MediaTomb With a default Ubuntu installation, you can find the configuration file at '/etc/ mediatomb/config.xml' on your filesystem. On a NAS box, 'etc' can usually be found within '/opt'. You need to open the configuration file into a text editor, but you also need system admin rights to be able to save your changes. Typing sudo gedit on the command line is one solution. When opened, you'll notice that the configuration file uses XML to encapsulate the various parameters, and these are then further split into sections that are indicated by their tabbed position within the file. This isn't necessary for the configuration file to work, but it makes it easier to see which parameters are attached to which elements. The default configuration file will work for many general devices, and you might want to try MediaTomb at this stage to see how far you can get. However, even a small amount of tinkering can tailor the file to better support your setup and media formats.
PS3 SUPPORT: If you have a PlayStation 3, you can enable support within MediaTomb by making a few simple changes to the default configuration file. By default it doesn't include support for the PlayStation 3, or the ability to create thumbnail previews for films. Both options can be enabled by editing a single parameter, or by removing the comments from the beginning of the appropriate lines within the configuration file. To enable support for the PlayStation 3, look for the line that includes ' '. It will be followed by a comment, highlighted blue in Gedit. All you need to do is swap the word 'no' for 'yes'. After the file has been saved and the server restarted, you'll have PlayStation 3 support. Further down the file, if you want to enable support for DivX streaming to the PlayStation 3, look for the line ' 3. Enable transcoding MediaTomb's strongest feature is its ability to convert a file from one format to another while it's playing, but before this can work, it needs to know more about your system and which tools you intend to use for the process. You might want to convert your Ogg Vorbis music files into raw PCM format so they'll work on players with no native support for Ogg Vorbis. The tool you need in this instance is ogg123 – a command line utility that takes an Ogg Vorbis file as an input and spits out PCM when used with the correct arguments. You can find that exact example hidden within the MediaTomb configuration file, but before you reconfigure the command, you first need to enable transcoding. Transcoding is disabled by default, because each conversion process requires a specific tool. Without those tools installed, the transcoding will fail. You need the 'ogg123' command for Ogg Vorbis conversion. You can install this by grabbing the 'vorbis-tools' package with Synaptic, and you can see which other command line tools are needed by skimming through the configuration file. After you've installed this, change 'no' to 'yes' on the ' ' line.
ENABLE TRANSCODING: Transcoding is disabled by default because each file format requires a specific conversion tool, without which the transcoding will fail. The configuration file will tell you which tools you need to convert which formats. Following this, you'll see the transcode mapping section. This is where MediaTomb takes the requested mimetype for a format, and turns it into a profile within the config file. It's within this profile that the conversion takes place. For Ogg Vorbis conversion, find the profile named 'oggflac2raw' and change the enabled field to read 'yes'. Below this, you'll find the lines that deal with the execution of the 'ogg123' command. If you run into problems with the transcoding, this is the first place to look. The last option that needs to be changed involves enabling the web-based user-interface, which for some reason is disabled by the Ubuntu package. Search for ' ' and change the 'no' to 'yes' before a final save of the file. 4. Running MediaTomb With the configuration file saved, MediaTomb needs to be restarted from the command line. Just type 'sudo/etc/init.d/ mediatomb restart' to get it going. You should now be able to access the web interface we've just enabled in the configuration file. This can be accessed by opening a browser on the same machine MediaTomb is running on, and typing http://localhost:49152 into the location bar. You can change the port number within the configuration file if you feel '49152' is too random, or if some other service is already using the same port. By default, MediaTomb increases the port number by one until it finds one that's free. To access MediaTomb from another machine on the same LAN, substitute 'localhost' for the IP address of the MediaTomb server. The browser UI is used to add content to the MediaTomb database, and after this content has been added, your various UPnP clients will be able to access that media, whether it's photos, music files or movies. To get started, click the 'Filesystem' link in the panel on the right. You will now see all the files and folders within the top directory of your system's main drive. Use this to navigate to your media collection. When you find a folder containing the files you want to stream, you can either add the directory to the database using the '+' symbol adjacent to your current location, or add file and folders individually using the '+' symbols to the right of their names. Alternatively, use the '+' symbol over a reload arrow to configure MediaTomb to watch for new contents in the folder, automatically adding any new and compatible files to the database. 5. Using MediaTomb The final step is to find a UPnP client to test the setup. In your living room, this might be a PS3 or standard media streamer, and you should see the MediaTomb server as part of the UPnP browser without further configuration. On a PS3, for example, the 'Video', 'Photo' and 'Movie' sections will contain a link to that kind of media on your MediaTomb server. You'll also find the same functionality behind your favourite UPnP client. From a Linux box, the easiest way to test your UPnP library is to use VLC, the Video LAN Client media player. It's supported UPnP connections for the last few years, and because it's capable of playing most music and video formats, it's the perfect way to access your media collection. It's only a search and apply away within Synaptic.
MEDIATOMB UI: Use the plus symbols to add files and folders to your database. You can also configure MediaTomb to watch for new content in a particular folder. To enable support for UPnP, open VNC's 'Preferences' window and click 'All' on the 'Show Settings' switch in the bottom left of the window. This will show all the possible options rather than just a select few, and you should see that the 'Service Discovery' option appears under 'Playlist' in the panel on the left. Select this, and in the services listed in the main window, enable 'Universal Plug'n'Play'. Click on 'Save', then 'Playlist' from the 'View' menu. This will show a media browser panel on the left. You should be able to see the contents of your UPnP server by clicking 'Local Network | Universal Plug'n'Play'. MediaTomb should appear as a source, and you'll then be ready to test your media content.
| ||
| Review: Sony Vaio VPCEC3S0E/WI Posted: 06 Feb 2011 02:23 AM PST  Sony's VAIO E-Series has been very popular of late, offering a range of high-quality yet affordable machines that are ideal for home use. The VAIO VPCEC3S0E/WI (£919 inc. VAT) is a big-screen model aimed at those seeking a stylish desktop replacement. Using a combination of white and silver plastics, the large chassis looks every bit the high-end home media centre and looks great in the home office or living room. With its huge 17.3-inch screen this is a laptop designed strictly for home use. The chassis is by far the largest in this group test and is not one that you'll want to carry far. At 3.1kg, it is a little lighter than we had expected, however, so you can work around the house in comfort. Of course, the benefit of such a large screen is the excellent multi-tasking and multimedia abilities it provides. Multiple windows can be placed side by side with ease and movies and photos look great, thanks to the stunning brightness, colour and contrast the screen provides. The screen also features the highest resolution in this group test, allowing it to provide stunningly sharp images. While it is not fully HD compatible, it renders software, photos and videos with impressive clarity, adding to the entertainment ability of this machine. With a dedicated ATi graphics card driving the screen, there is plenty of power for playing games, watching high-definition (HD) videos and editing your photos. The HP Envy is significantly more powerful in this area, however, reducing the impact of the Sony somewhat. Home office performance is more in line with its rivals in this group and equally capable. The Intel Core i5 processor runs software with effortless speed and makes it easy to multi-task several applications at once.
Excellent usability Usability is excellent. The wide chassis provides enough room for a full-sized, isolation-style keyboard and features a dedicated numeric keypad. Along with the Asus U53Jc Bamboo, this is one of only two laptops here to feature such a pad. Adding to the value of the Sony is its excellent software. Microsoft Office Starter provides market-leading word processing and spreadsheet tools, while McAfee Internet Security will help to keep your laptop safe against the plethora of online threats currently out there. Offering stunning big-screen usability and ample power, the VAIO VPCEC3S0E/WI is a fantastic home laptop. While it lacks the graphics performance or battery life of some of its rivals, there is more than enough to compensate, making it a worthy winner. Related Links
| ||
| Posted: 06 Feb 2011 02:10 AM PST -200-200.jpg) LG's close links with Sky and its 3D service are well publicised but not everyone is ready (or wealthy enough) to enter the third dimension right now. To that end, LG also boasts a wide range of conventional sets that offer bucketloads of other features without having to pay the inevitable 3D premium. The 42LE4900 is one such set, offering edge LED backlighting and all the enticing slimness that comes with it, as well as coveted baubles including a built-in Freeview HD tuner, internet TV access, DLNA networking and much more. That's a heck of a lot to pack into a sub-£600 set, so we can only hope that LG hasn't sacrificed picture quality on the altar of good value. The 42LE4900 is just one of many non-3D LED TVs in LG's latest range. The 4900 series, alongside the lower-specified 490 LCD range, was launched last year and as affordable sets with built-in Freeview HD, they're part of LG's 'commitment to offering consumers easy access to hi-def content'. The 4900 range also comes in screen sizes of 32 and 37-inch, making this a range very much aimed at those with modestly sized living rooms to match their modest budgets. As mentioned previously, the 42LE4900 boasts a feature list that may exceed what you expect from a sub-£600 set. Without 3D to hog the headlines, the honour of attention-grabber supreme goes to the Freeview HD tuner, which will no doubt be the first item on many people's shopping list. BBC One HD, BBC HD, ITV1 HD, Channel 4 HD – they're all there, ready and able to make your eyes pop out with their scissor-sharp detail. Then there's DLNA networking, which is now very much an established part of the home entertainment landscape. It enables you to stream movies, music and photos from your PCs, laptops and other entertainment devices, and, as normal for LG gear, it welcomes all formats. It's joined on the spec sheet by NetCast, which was a handy little feature when it first emerged, but is now looking tired and hamstrung by a dearth of compelling content – you get YouTube, Picasa and AccuWeather.com, only one of which is worth bothering with. Thankfully, 2011 promises great things for LG's internet TV offering with the introduction of its new Smart TV system, which bumps up the content and brings full-on web browsing to the table. For now though, the 42LE4900 will have to make do with the old version.
These services are piped into the Ethernet port, which also will bring any future IPTV services on Freeview HD to your living room. Have a butcher's on the back panel and you'll spot two USB ports, which enable you to play MP3, DivX HD, WMV HD, MP4, XviD and JPEG files from memory devices. Elsewhere the 42LE4900 goes the extra mile when it comes to picture adjustments. These include LG's regular Imaging Science Foundation-approved Expert Mode settings, which make it possible for a professional engineer to come over to your house and spend a few hours calibrating the set to within an inch of its life. Tweaks include a deep and detailed colour management system, with brightness, contrast and tint settings for red, green and blue, plus gamma, noise reduction, black level, colour gamut and temperature settings. But if you're a little bit shy about all that stuff, the built-in Picture Wizard makes it easy to get the picture looking shipshape. They're joined by other modes such as Dynamic Contrast, Dynamic Colour, Real Cinema, Eye Care, xvYCC, Clear White and an energy saving setting if you're concerned about your carbon footprint. Despite its ultra-slim profile, LG has managed to squeeze a considerable amount of connections onto the rear panel and along the side, including four HDMI inputs, optical digital audio output, two sets of component inputs, composite input, PC input and a good old-fashioned Scart socket. Like the rest of LG's current TVs, the 42LE4900 boasts a wonderful menu system. When you first dive in, you see a beautifully presented grid of options that uses detailed, full colour graphics. It covers all of the main functions, including direct access to the Picture and Sound menus so you can zip straight to them without having to go via the full setup menu. From here you can also visit the networking feature (under My Media), check out NetCast (although this also has its own button on the remote) and fiddle about with eight cute little games, which is a nice surprise. The setup menu itself is laid out with the same gorgeous graphics and fonts, plus it operates with a fluidity that precious few TVs can match. The basics are all up front, making them easy to find, but anyone who wants the more complex settings doesn't have to look too hard. This is still one of the most user-friendly menu systems around. The Freeview HD displays are also superb. From the eight-day EPG to the onscreen info banners, they boast a clarity and legibility that pays dividends when used on a regular basis. And we encountered no problems finding our content on our networking feature or a USB stick thanks to the straightforward, folder-based menus. In the case of USB playback, the TV shows a thumbnail for each file – now that's impressive. Despite its limited content, NetCast is beautifully presented, using three large icons in the foreground with a street-based backdrop, giving it a fun, family-orientated flavour. The remote makes up for its slight plasticky feel with considerate button placement. The central panel of menu controls places the direction keys in the middle and dots the most-used buttons around the edge, making everyday operation an absolute breeze, plus the volume, programme change and number keys are all exactly where you'd expect to find them. Also useful is that some of the buttons glow in the dark so you can navigate with the lights off. First impressions are generally positive, with the 42LE4900 delivering a bright, punchy picture that lends itself well to high-definition material. That means blockbusting films like Avatar look instantly dazzling, with Pandora's cartoon-like colours beaming from the screen with eye-popping intensity. But there's a pleasing subtlety to the set's colour reproduction too, conveying tonal blends smoothly and tackling Sam Worthington's tricky, stubbly skin with a convincing tone. Not quite the lucid, life-like reproduction of some sets, but certainly a great effort at this price. Detail reproduction is also terrific. The XD Engine at the heart of the set lets none of those pixels slip through the net, making the movie's complex CG textures and landscapes look razor sharp, while objects are strongly defined around the edges. Shots of Pandora's wild and wonderful creatures ram the point home, as the set picks out hairs, scaly skin patterns and fine glimmers of light with ease. The 42LE4900 isn't quite as assured when it comes to black levels. Switching over to a darker, moodier movie, such as Inception, shows up the set's unconvincing attempts at conveying blacks and picking out shadow detail.
This becomes a problem when it's asked to display scenes like the night-time aerial sweep over Paris – the screen looks mushy and indistinct, with the different buildings merging into a mass of black in certain areas. Inside Sato's in-dream apartment, dark areas in the background are black holes, while the definition of the lapels and pockets on Cobb's black jacket aren't as pronounced as they might be. Another problem is that the edge LED backlighting causes some pooling of light in the corners of the screen, which is clearly visible when you play a movie with black bars and during dark scenes. And one final negative concerns the set's lack of fluidity when it comes to motion. With none of LG's TruMotion anti-blur processing on board, you get a fairly smeary trail behind fast moving objects and hints of judder here and there, particularly during camera pans. Test clips from a calibration disc showing fast-moving trains and quick camera pans up and down buildings display enough judder and blur to make you feel queasy. But despite these shortcomings, which to be fair most people might expect from a sub-£600 set missing powerful picture processing, it produces very vibrant, engaging pictures with lots of detail and radiant colours. This lends itself well to digital TV, which looks particularly crisp and solid. Hi-def channels look terrific, and although there's evidence of noise on SD channels the images are eminently watchable. And as an upscaler of SD material the set does a decent job, giving our Avatar DVD pleasing clarity and depth when fed in at 576p Like an eight-stone opera singer, the 42LE4900 musters a surprising amount of sonic power from its skinny frame. We're not quite sure how, but the scene in chapter 2 of Inception, when the building collapses, sounds loud and detailed, and high frequencies are relayed without excessive harshness. However, it's still boxy in tone and seriously lacking in bass, which is fine when watching Dickinson's Real Deal but gets a bit wearing when you watch Inception all the way through. Value Weighing up the amount of features against the circa-£600 price tag, we have to conclude that the 42LE4900 offers good value for money. It's great to find DLNA features and USB playback on the spec sheet, plus you don't find picture settings this detailed on many sets at this price. That value factor does start to dip once you consider the picture shortcomings, the lack of on-board processing and the limitations of LG's current internet TV offering, but even then there's still enough good stuff here to stop you feeling short-changed. The 42LE4900 is a great-looking TV set, boasting super-slim dimensions (thanks to its edge LED backlight) and a fetching gloss-black bezel. And at this price, the feature list is equally attractive, including modern-day frills like DLNA networking, NetCast and digital media playback from USB, not to mention the unusually detailed picture settings. There's no motion processing or 3D support, but sacrifices were always inevitable at this price and what's left still makes it feel like good value. It's a pity then that the LG's picture quality couldn't transcend its price tag – sure, you get bright, engaging picture quality with bright, engaging Blu-ray moments, but watch dark scenes and the poor black definition and backlight issues mean you're not seeing movies at their very best. It's fine for everyday TV viewing but anyone with serious cinematic ambitions should save a little more moolah and check out one of LG's better specified sets.
We liked The 42LE4900's hi-tech design looks great and its space saving 35mm profile is undoubtedly appealing. The inclusion of networking, flexible format support via USB and internet TV access (albeit limited) is also pleasing for the money. There's a generous range of connections and the detailed ISF-approved picture settings help you (or an engineer) find a picture balance to suit. Also impressive is the slick, attractive operating system. We disliked The set struggles with black levels, making dark scenes look a little mushy, while backlight issues cause pooling in the corners and poor motion reproduction leaves objects looking blurry and juddery. NetCast offers limited content compared to rival sets from Sony and Samsung. Verdict If you've got around £600 to splash on a TV then you could do a lot worse than the 42LE4900. There's a tasty array of features on board, the likes of which you don't always find in this price bracket, and like many of the latest LED-equipped sets its slim, sexy looks will be a perfect fit for any living room. Generous connectivity and extensive picture calibration settings are further high points. That said, you will have to make some sacrifices in terms of picture quality and on-board processing. Problems with black levels, uneven backlight distribution and a lack of motion fluidity don't show movies to their full potential. But if you're fine with that then you may find enough to like elsewhere to make the 42LE4900 a good purchase. Related Links
| ||
| Tutorial: How to add cool Dock effects to OS X Posted: 06 Feb 2011 02:00 AM PST  In this tutorial, we use Deeper. Available as a free download from Titanium Software, Deeper takes the custom options from the popular Onyx and welds them to a standalone application that enables you to fiddle with hidden Mac OS X settings. TinkerTool is in a similar space, but doesn't enable you to add multiple recent-item stacks and spacers to the Dock. If you're comfortable using Terminal, you can avoid software entirely.
(Note that before you input any of the following commands, make a copy of com.apple.dock.plist from ~/Library/Preferences. Should you later want to revert to your old Dock settings, trash the updated preferences, drop your copy into the aforementioned folder, and use killall Dock in Terminal to restart the Dock.) To remove the Dock's glass, use defaults write com.apple.dock no-glass -bool YES (replace YES with NO to revert); to make the icons of hidden applications semitransparent, use defaults write com. apple.Dock showhidden -bool YES (again, NO reverts); for each recent item stack, use defaults write com. apple.dock persistent-others -array-add '{"tile-data"={"listtype"= 1;}; "tile-type"="recentstile";}'; and for a document spacer, use defaults write com.apple.dock persistent-others -array-add '{tiledata={}; tile-type="spacer-tile";}' (use persistent-apps instead of persistent-others to add the spacer to the applications side of the Dock). Type killall Dock to apply changes. How to go Deeper into the Dock 01. Get Deeper
Download, or install Deeper from your disc. The app will ask for your administrator's password; type it in the Password field and click OK. Deeper will take a moment to check your existing setup, and it'll then be ready. Click Dock on the toolbar to access Dock options. 02. Remove the shelf
With Deeper you can apply a 2D effect when the Dock is at the bottom of the screen, removing the glass shelf that many people find confusing and annoying. You do this by setting Appearance to 2D with transparency effect, then clicking Continue. 03. Reveal hidden apps
Running applications in the Dock have a dot underneath them, but by default there's no way to flag hidden applications. In Deeper, check Use transparent icons for hidden applications. Confirm by clicking Continue; Deeper will relaunch your Dock. 04. Hide some applications
Due to the way the Dock's settings work, hidden applications won't immediately have transparent Dock icons. However, the next time you activate and then hide any application, its Dock icon will be semi-transparent, thereby making it easier to tell that it's hidden. 05. Add a recent-item stack
Click the Add button in Deeper's Stacks section in the Dock options. To the right, you'll see a stack of apps. Click it and it will display a fan of your most recent applications. Ctrl-click the stack and you can change its view options – Grid is a good format for this kind of stack. 06. Add another recent stack
Ctrl-click the stack again – notice the options at the top of the menu. Select one to change what the 'recent' stack shows: apps, documents, servers, volumes or items. Click Add in Deeper to add a second stack type, so you can have one for apps and one for documents. 07. Add Dock spacers
Each time you click the Others button towards the bottom of Deeper's Dock section, a spacer will be added to your Dock's documents area. Spacers can be dragged, so you can group Dock items. Click the Applications button to add a spacer to the Dock's applications area. 08. Change your mind
If you decide you preferred things as they were, click Restore Defaults, and the Dock will return to its standard state. Any added spacers and recent stacks can be dragged from the Dock like any other item. Alternatively, use the preferences trick.
| ||
| Posted: 06 Feb 2011 12:00 AM PST  On 20 October 2004, the first version of a new and unknown project called Ubuntu was released. It was called the Warty Warthog. The only thing that most Linux users knew about Ubuntu was that it was based on Debian and bankrolled by some millionaire they had never heard of. Little did anyone know that said millionaire, Mark Shuttleworth, would invest so significantly in a much needed aspect of open source – the user experience. I'm not going to talk about how Ubuntu was formed, the impact it's had on Linux or the growth of the project and community; much of that has already been said. Instead, I'm going to tell the story of Ayatana, the design project that powers Ubuntu, sharing some of the behind-the-scenes stories of what went on. So grab a cup of coffee, sit back and let's talk about how Ayatana might revolutionise Linux and bring it to the masses. In the beginning When I joined Canonical back in 2006 as the Ubuntu community manager, the focus was simple: to deliver the latest and greatest open source software in a simple and integrated fashion. To achieve this, we made sure Ubuntu came with a large number of upstream projects. Some were underlying tools, such as the Linux kernel and the X display server, and some more user-facing, such as the Gnome platform and its suite of applications. The Ubuntu team always had its nose to the ground looking for the next big thing that it could bring to users, often investing in pieces of development that would satisfy needs that weren't yet met. One example was the Jockey tool, which helps you install additional drivers if your hardware needs them. Back in 2008, Mark Shuttleworth called me over to his desk to share some thoughts about something he referred to as "awesome attention management". Around that time, Matthew Paul Thomas, a well-respected user-interface design specialist, had been working on a new project with him. Mark showed me a wiki page with an incredibly detailed set of guidelines around what looked like some rather cool notification bubbles, and told me this was going to be amazing for the community and for Ubuntu and that I should expect some work surrounding the idea. Mark is an excitable guy, but I'd never seen him like this before, and I knew his enthusiasm meant my job was about to get busier. The project he was referring to ultimately became Notify OSD, the now-familiar black notification bubbles that appear in Ubuntu. While I was aware of the plan, I didn't know of any plan to put actual code into Ubuntu. It was currently being eagerly hacked on by Mirco Mueller and some other developers at Canonical. As Mark's design project progressed, he began to recruit two teams: one for design and the other for development. One key appointment was the head of the development team; a chap called David Barth, who'd been working at Mandriva. Mirco and co would be reporting to David, and his job was to take the designs from the team at Canonical and manage a set of engineers to deliver the work as free software. This would then be packaged and integrated into Ubuntu. The notification area In 2008, the twice-annual Ubuntu Developer Summit was held in Mountain View, California. There, Mark demonstrated the work that had been done on the new notification system in front of an audience. He talked through the considerations and inspirations behind the idea, and the incredibly detailed thinking that went into the design process. The people listening were pleased: the demonstration looked impressive, even though code wasn't yet available. That was set to launch with the upcoming version of Ubuntu, the 9.04 release entitled Jaunty Jackalope. Ultimately, the notifications did land in Jaunty, although much to the chagrin of some Ubuntu contributors. The code came late in the cycle, and this was seen as a faux pas. The community had a valid point; it did take too long, and we tried to assure our contributors that we would do better in future. Fortunately, the issue was a tractable problem that could be solved, and was indeed fixed in further cycles. Despite the rocky initial responses from Ubuntu developers, the work was well received by the wider community and users. In addition to the notification bubbles, the Jaunty release also included the Messaging menu. The idea was to provide a single icon in the notification area of the panel that would contain any messages relevant to the user. For example, it would show social media updates such as Twitter or Identica messages, new emails, instant messaging chat and more.
MESSAGING MENU: Ubuntu's Messaging menu glows, alerting you to messages you should act on The first iteration of the menu worked, but there was still a lot of development to be done to build support for different applications to talk to it, and to present further information that was relevant to Ubuntu users. Many of these improvements landed in the Ubuntu 9.10 Karmic Koala release, including the Me menu; another addition to the top-right part of the panel that enabled users to shut down and restart their machines, and get access to some other features relevant to the current session. Karmic was another positively received release, but many were asking some of the same questions – why is Ubuntu spending so much time focusing on the top-right part of the screen? Aren't there lots of other bits of the desktop experience that should be fixed and resolved? It was a good question. While the design work being done was detailed and solved some important problems, other more visible parts of the Ubuntu experience hadn't been targeted. The team would get there, though – they just weren't going to sacrifice quality in the design experience, and would move on when they were ready. Fortunately, many of the future ideas were already being developed; the design team was working ahead of the current cycle to ensure that the developers had completed concepts to work with. In addition to the improvements in the top-right area of the screen, significant work had been done on the boot experience in the Karmic cycle. Mark Shuttleworth had made it clear that the Ubuntu boot time needed to be faster than ever, and Scott James Remnant took his existing work on Upstart and began optimising the many different parts of the process. At a company event held in Dublin, he showed Ubuntu booting faster on a Dell Mini 9 netbook with a normal hard drive than Windows 7 on the same machine with a super-fast solid state disk. In addition to this, extensive work was done to deliver an attractive graphical boot, using a tool called XSplash that was developed at Canonical. The idea was to get the X display up as quickly as possible, and to show the boot splash so that the transitition was smooth when you needed to switch to the login manager. All of this landed in the Karmic release, and was again well received by users. Application indicators With the Karmic release out of the door, the design and desktop experience team decided to focus on the top-right part of the panel again. Mark eagerly proclaimed that "we were going to finally fix the notification area", something that had been a common source of problems for Ubuntu users. The issues were subtle, so let me explain why this work was performed. Traditionally, the notification icons in the top right of the Gnome panel had been something of a usability ghetto. There were numerous faults: Messiness - There were a wide range of icons, many of which looked ugly on the panel with their multiple colours. Limitations Applications - could only set one icon, and the same icon was displayed in the menu and the notification area. This made it impossible to set an attractive black-and white icon for the notification area while having a full-colour one in the menu. No scrubbing - It was frustrating to have to click each notification icon separately to see the menu. You couldn't click once, slide your mouse over and then scrub to get the menus to drop down. Inconsistent interfaces - Notification icons often had an incredibly variable set of interfaces. Some had left-click menus while others had right-click ones, and some had different menus for left-and right-click. Accessibility - Existing notifications had accessibility issues, and often couldn't be controlled via keys. The design team felt that these were significant problems that needed resolving, and thus the application indicators project was started. This was based on the same technology as the Messaging and Me menus, and provided some important changes.
PLACES: The Places feature in Unity manages to provide a consistent experience for almost any kind of customisable content Firstly, different application icons could now be set in the notification area and main menu. Secondly, notification icons could be clicked and scrubbed with the mouse. The interface was also much simpler – only menu items, checkboxes, radio buttons and labels were displayed, and only on a left-click menu; no right-click menus were supported. Because the notification interfaces were based on menus, they were far more accessible. At a design sprint in Dallas, we got ready to ensure that the community had quick and easy access to this new technology, which was due to feature in the Ubuntu 10.04 Lucid Lynx release. We made sure we prepared documentation, and started working with upstreams to encourage people to use the technology. Many started porting their applications. Cody Somerville, Ted Gould and Jason Smith all stepped up to help us integrate the indicator idea into the Gnome panel, creating an implementation with C, Python and C# bindings. Jorge Castro also made people aware of what we were doing, and Aurélien Gâteau continued to perform his excellent work with KDE. Then there were the applications themselves: Brasero, Gnome Bluetooth, Gnome Power Manager, Gnome Settings Daemon, XChat-Gnome, iBus, Nautilus, PolicyKit, Empathy, Gwibber and more. These were all ported with notification indicators, and came with Ubuntu to the new framework. The wider community also got really involved with the technology, much to our delight. The system monitor, device mounting alerts and workspaces were all given brand-new indicators, as were the applets for weather and screenshotting, and we received patches for Lernid, LottaNZB, Banshee and Déjà Dup. What's more, we were provided with support for the indicator framework built into AWN and Lubuntu, among other things. System indicators Although any application can employ this indicator technology to put an icon in the new notification area, there are some with icons that simply appear there all the time. These are referred to as system indicators, and include the sound indicator (with which you can control volume) and power indicator (which shows battery and charge details). The design team chose to really focus on these, and there have been two additions that are worth mentioning. In Ubuntu 10.04, the microblogging client Gwibber launched a new release. The Ubuntu design team felt that most users would want to tweet throughout the day, so a design was drafted for posting messages right from the Me menu. As such, someone could be working away and feel like sharing something with the world – all they needed to do was click the Me menu. They could then type in a message and it would be broadcast to all the clients that had been configured (Twitter, Facebook and Identica, for example). Another extra, and one of the most highly anticipated new features for the Ubuntu 10.10 Maverick Meerkat release, was an addition to the Sound menu. Many users would be listening to music while working, and would only interact by skipping tracks and other transport controls.
RHYTHMBOX: Playback supports Rhythmbox and will work with banshee before long As such, Conor Curran built support into the Sound menu so that people could see the current playing song and use the transport controls. It was a devilishly useful feature, and saved you doing lots of clicking to complete something fairly simple. Again, all of the indicators and features in the notification area used the same technology in the back-end. Unity and the Global menu At the Ubuntu Developer Summit in Belgium in May 2010, Mark Shuttleworth presented the Unity project; a new graphical shell that is designed around the requirements of netbooks. Horizontal screen space is limited, and it caters for the increasing number of touch-ready devices. Unity has a series of key components: Launcher - This is a scrollable list of icons that appears down the left side of the screen. As the icons take up more space than the screen can display, a concertina-style wrapping technique is used, and when the mouse is hovered over the squeezed icons, they expand again. This provides an effective way of running many applications that can all be accessed easily. Dash - This is an overlay that appears automatically when you click on the big Ubuntu button in the corner of the screen. It will be utilised by future designs, but today provides users with quick access to some common features, such as applications and new software. Places - On the Launcher there are buttons for viewing different types of content (applications, files and trash, for example) with the same user interface components; this facility is called Places. The feature is entirely programmable, and developers can create new kinds of Places – in fact, the demo shows how you can use the unified search box to query YouTube and display videos inside Unity. Indicators and notifications - All of the indicator work that has been shipping in Ubuntu is also harnessed by Unity and available in the top-right part of the interface.
ME MENU: Tweet from your desktop with just one click A key goal with Unity has been to make maximum use of screen real estate, particularly with the original focus on netbooks. With this in mind, some work went into a Global menu project that uses the same infrastructure as the application indicators but to disconnect the menu from the application and put it in the top panel (similar to Mac OS X). In addition to this, when applications are maximised, the window bar collapses into the panel and the window buttons appear in the panel next to the menu items. This saves a surprising amount of screen space. Unity eventually shipped in the Maverick release, and while the design was generally well received, some Ubuntu users experienced significant problems on certain hardware. This was largely due to the underlying graphics subsystem. These performance issues are actively being resolved. Ubuntu 11.04 Five months later, at the Ubuntu Developer Summit in Orlando, Florida, Mark Shuttleworth made one of the most significant announcements in the history of Ubuntu: on all hardware that could support it, the Unity interface will come as standard in the upcoming Ubuntu 11.04 release, codenamed Natty Narwhal. For hardware that's unable to run Unity, a 2D fallback will be used in the form of the current twopanel Gnome interface. This was huge news for Ubuntu and the upstream Gnome project. For the former, it was a significant move to a new piece of technology that should bring about an enhanced user experience and a unified touch-ready interface across a range of devices. Some members of the Gnome project saw it as a blow, though. For some time now, a lot of work has gone into the Gnome Shell project, and it was felt that Ubuntu not supplying it was a sign of the distro moving away from Gnome. Some even threw out accusations that the move was effectively a fork of Gnome. In reality, that's not true. Unity is a shell for Gnome, but not Gnome Shell. It's still a Gnome platform, and the next incarnation will come with all the components Gnome application authors need to make their software run out of the box. It will also still have all the Gnome apps users know and love. The only change is that Unity will be the default shell. Unity is just a different shell, in much the same way others have created a different interface (MeeGo, for example). It's a different porthole through which you can look at the excellent Gnome platform. With the announcement, accessibility became a a top priority. Currently, Unity has rather poor accessibility support (read: basically non-existent), and accessibility is a core ethos for Ubuntu. As such, Luke Yelavich from the desktop team was assigned to the DX group, who code Unity, to work on accessibility support. He's supported by Gary Lasker and synced up with the Ubuntu Accessibility Team, who provide support in the form of testing, bug triage and outreach. Outstanding accessibility is a requirement for Unity if it's to feature in Ubuntu 11.04. Quality is also a top priority. Neil Patel and the rest of the Unity team worked their socks off to get the interface ready for the 10.10 netbook edition, but despite their best efforts, some quality issues were highlighted and bugs were reported. When the announcement was first made, the team believed they had bug reports for the majority of issues, and are spending most of their time in the cycle focusing on resolving these problems with quality. Finally, although some people were worried that Gnome Shell would be completely lost and forgotten in Ubuntu 11.04, it is supported in the archives. While it won't be the default environment for Ubuntu, or come with the disc, we at Ubuntu believe that users should be able to get a top-notch Gnome Shell experience in our distro. With the Ubuntu Software Centre providing simple one-click access to software, getting that experience up and running should only require one quick action. Of course, when the news broke, a wide range of opinions were voiced, but the majority of them seemed to be cautiously optimistic. Essentially, people were saying: "If you can pull this off, it will be awesome." It seemed that most users had confidence in the design, but that some of the performance problems they experienced in the first release of Unity were making them a little nervous. Hopefully, all the hard work that's gone into resolving these issues should restore people's belief in the latest version.
TOUCH-READY: The Unity interface is touch-ready, so it can work on a range of devices Steven Vaughan- Nichols, a well-respected journalist who was at the Ubuntu Developer Summit when the announcement on Unity was made, summarised his perspective: "Can they do it? I think they have a shot. I do know that the traditional Linux desktop, much as I may love it, has reached about as broad an audience as it ever will. That said, the Ubuntu programmers have a lot of coding to do to make this happen. Then we'll see if Ubuntu has found a new way to popularise the Linux desktop." Steven has hit the nail on the head. This is a big change, and it's certainly a risky one, but Ubuntu has a long history of hedging its bets in the interests of serving its users better. Ultimately, when all the journalistic assessments and community discussions have settled down, the true deciders will be the users; they will say whether the experience is compelling enough compared to the alternatives. Wrapping up The sheer level of design focus that has gone into Ayatana and ultimately featured in Ubuntu has been impressive. There have been bumps along the way, with code landing too late, decisions being made with less than optimal interaction between the community and the design team and some slightly irksome wallpaper choices. However, this has been a learning experience for both the Ubuntu community and the Canonical designers. Bumps are fine as long as they act as learning opportunities, and that was the case here. Ubuntu looks fantastic, the incoming change to Unity is starting a new era for design and it will be exciting to see how Ubuntu will look in another two years. With the design team, growing community and wide group of developers and testers, anything is possible.
|


| You are subscribed to email updates from techradar To stop receiving these emails, you may unsubscribe now. | Email delivery powered by Google |
| Google Inc., 20 West Kinzie, Chicago IL USA 60610 | |
No comments:
Post a Comment